In This Page
Items Used
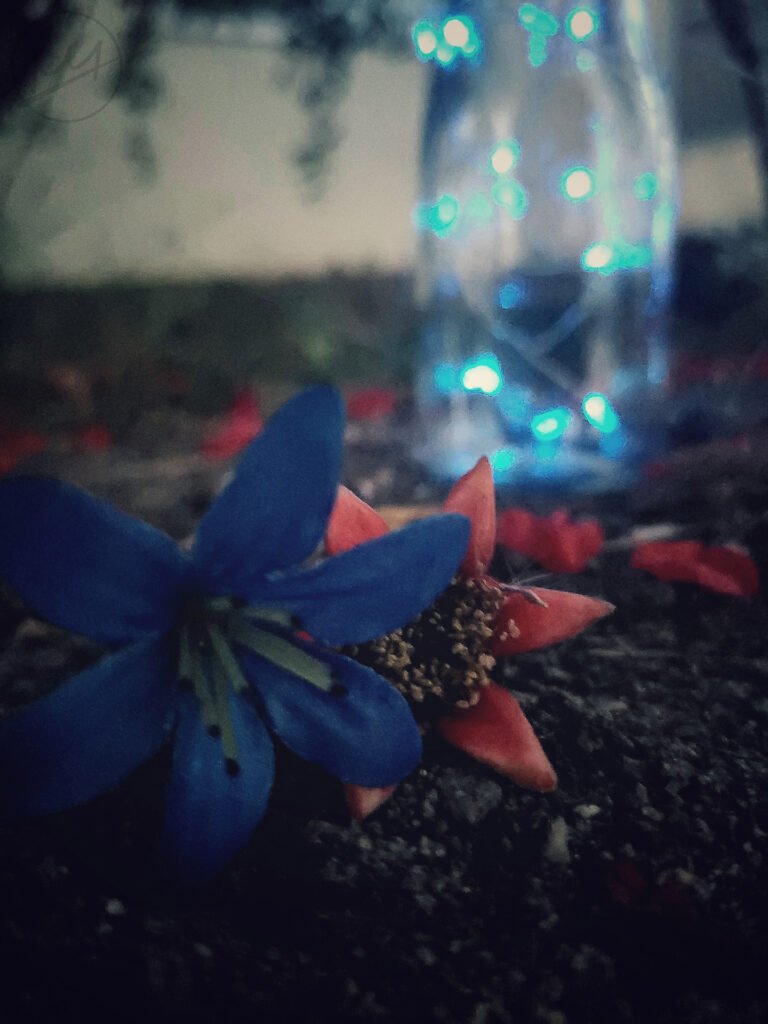
- Blue flower
- Red flower
- Glass jar
- Blue fairy lights
Preparation & Photographing
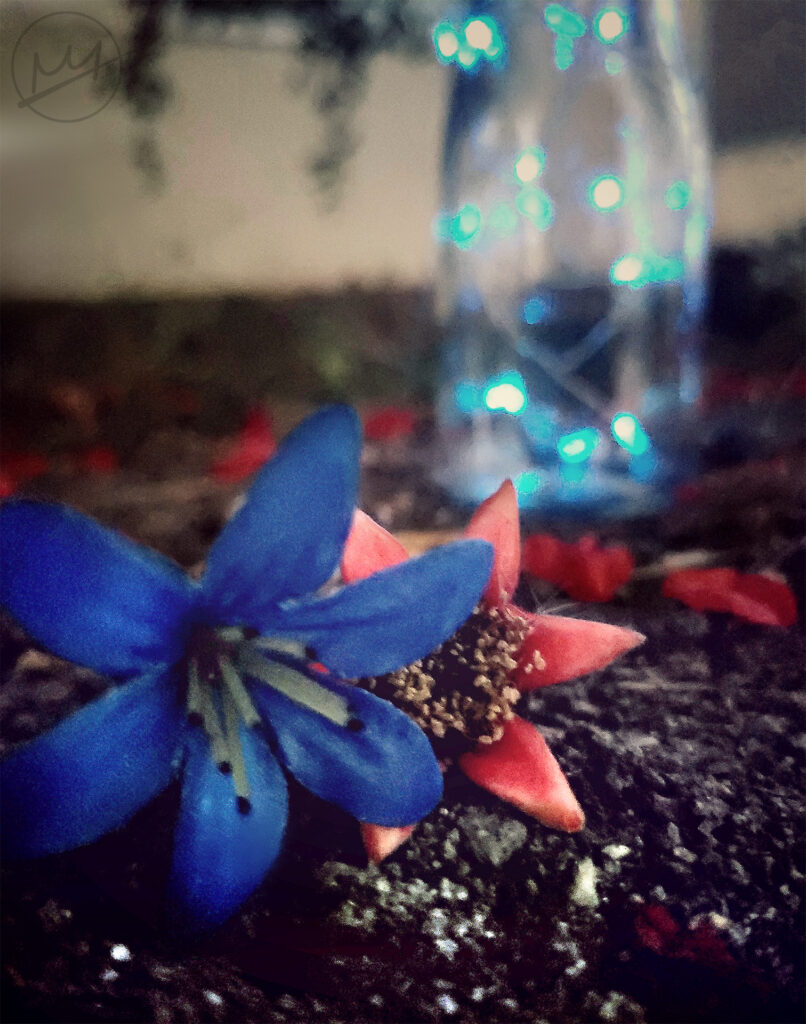
Underneath a large tree with low hanging branches, I set up the items. The floor was littered with petals and leaves so I cleaned the foreground area before setting the blue and red flower in the foreground of the camera. These flowers were also placed to the left to leave room for the glass jar which would serve as a background detail. Some back and forth between the camera and the jar to make sure the jar was in a good spot later and I took the photo. Below is the original unedited version:
Finishing Touches
In the end, I made two versions. One with my phone and one with Photoshop. However, with both, I began editing with the original version instead of building on one another like some of my other case studies.
Phone
Increase Brightness: The photo was dark overall so increasing the brightness fixed that
Increase Contrast: Darkened the surrounding areas of the subjects
Photoshop
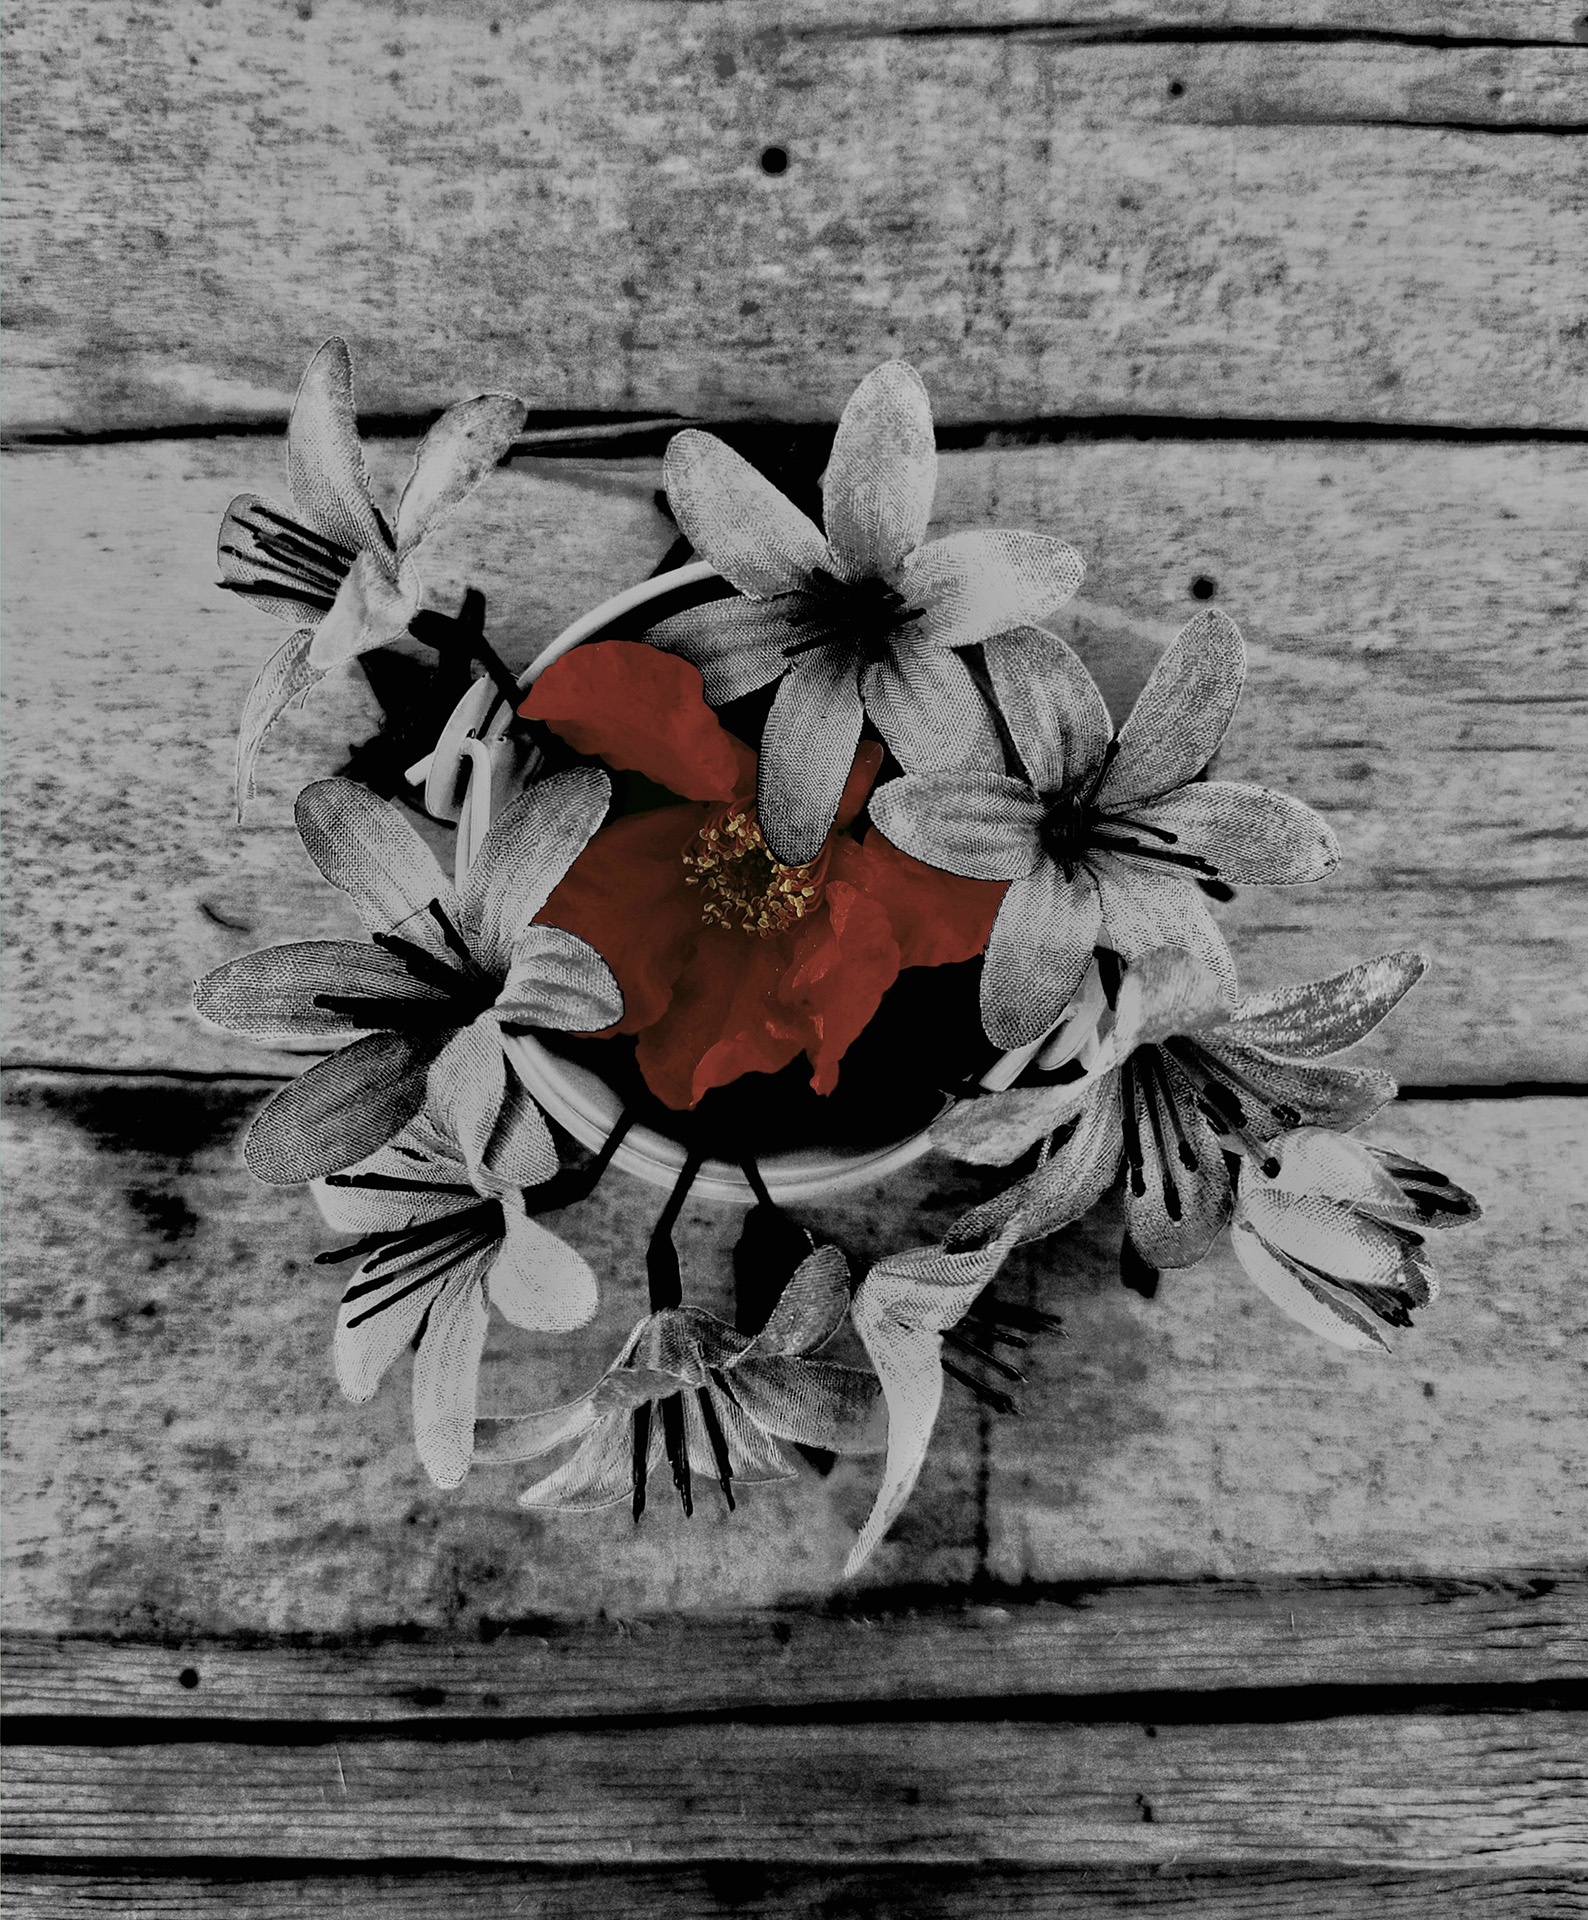
There were a few things that I did not like about the first edited version: The objects in the top corners, the blue hue of the photo, and the light coming from the glass jar became the main light source, glass jar was brighter than the main subjects in the foreground.
First, I used the Remove Tool (J) to remove the triangular objects in the top corners. Then I applied the following adjustment layers:
Curves: Brightened the entire image slightly. This layer served to adjust the background to where I wanted it to be
Increase Brightness: I used a mask so this edit would only apply to the flowers and dirt in front of them. This allowed the flowers to be more evident.
Decrease Contrast: The mask applied to the contrast as well, creating a muted effect on the area applied.
Levels: Increased the brightness of the foreground even more.
Color Balance: negated the blue hue
This resulted in the final image below: