In This Page
What Is Double Exposure?
A double exposure is a photograph that combines at least two photographs or “exposures” together.
Preparing The Images
To create this effect, at least two photos are needed.
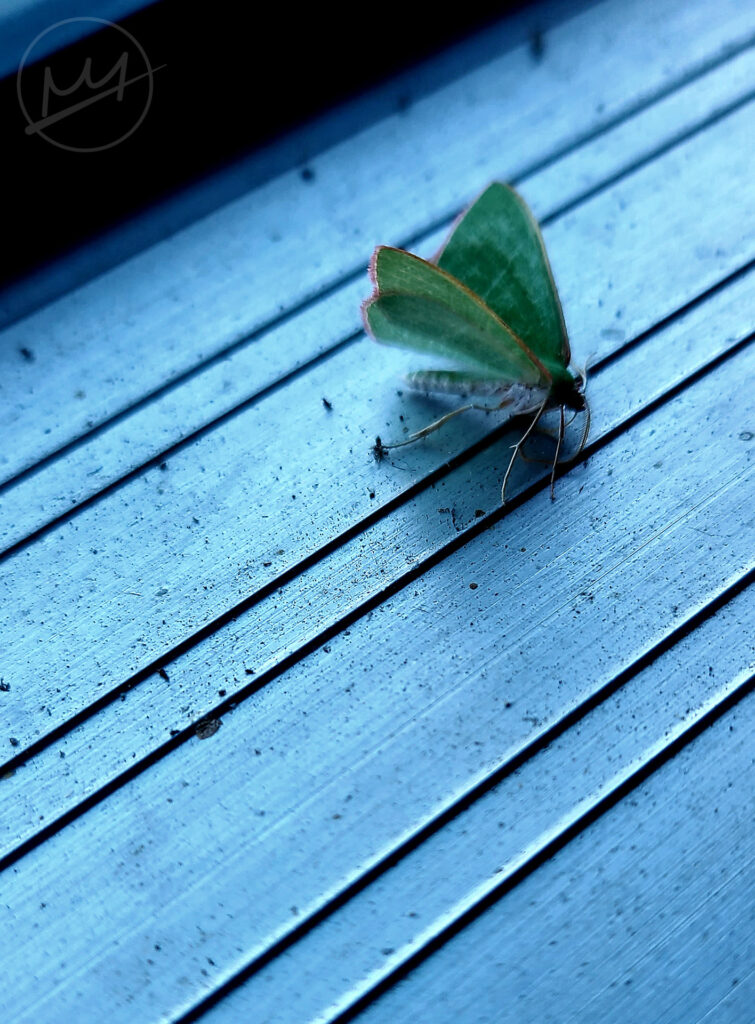
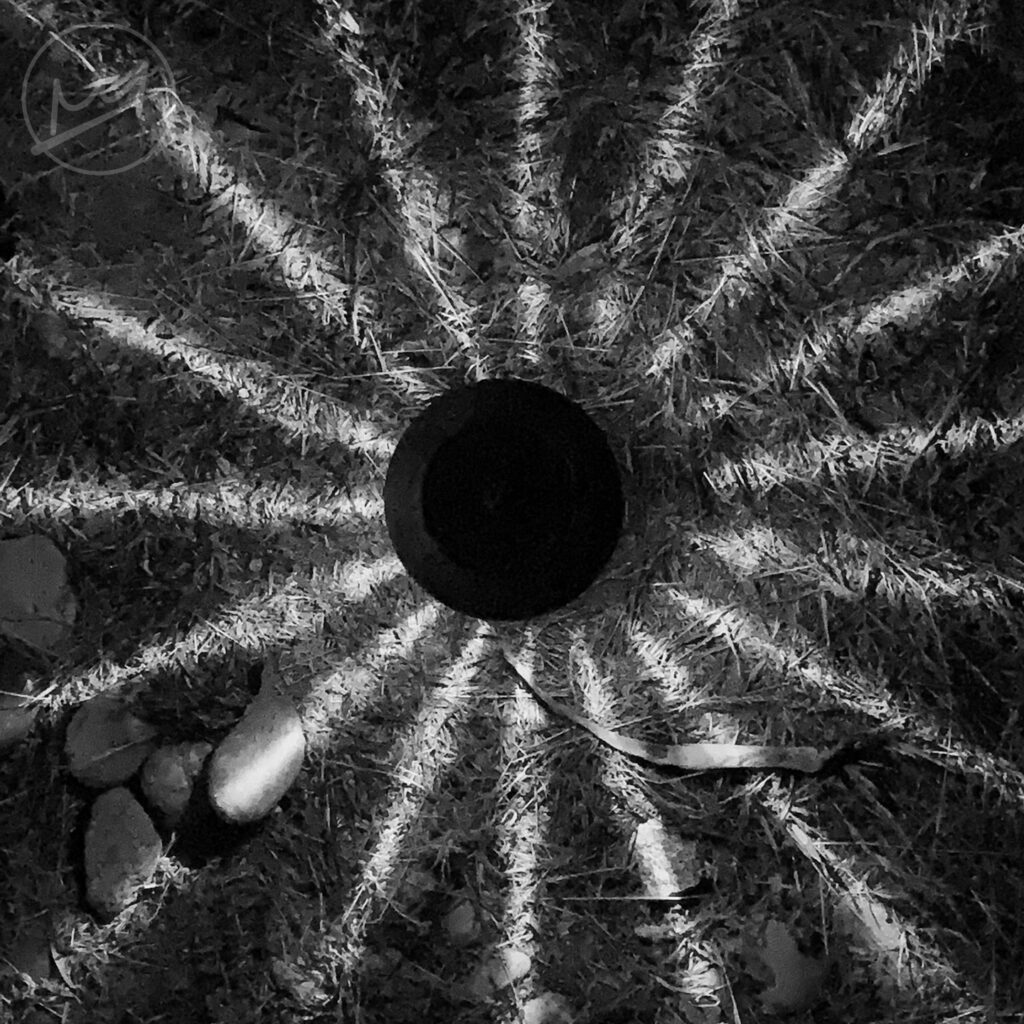
I started by taking a close up photo of a butterfly and a bird’s eye view of a garden lamp.
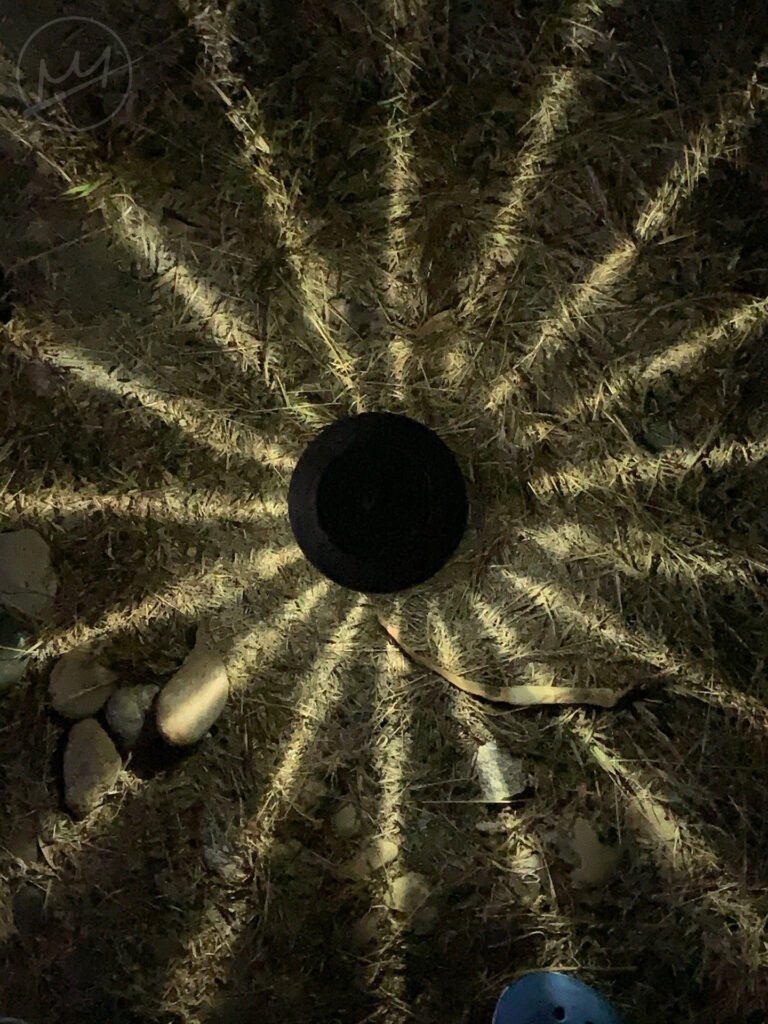
This butterfly photo is too long and my foot is visible in the lamp photo so they will need to be cropped. The final image will be in black and white so those photos need to be desaturated as well.
I ended up with these photos:
Putting The Images Together
I used the above two images, but it’s perfectly fine to convert both of them into black and white. Of course, not all double exposure images are in black and white.
Phone
I used a free drawing app called Ibispaint to create the final image.
In Ibispaint, if you open an image, the canvas will use the dimensions of the image, much like opening an image directly into Photoshop. I opened the lamp image so the entire canvas would be a 1:1 ratio.
Then, I imported the butterfly image. Unlike Photoshop, anything that is outside of the bounds of the canvas is cut off and deleted. Before I set the position of the butterfly, I moved it around so it was about at the center. Once setting the initial location, I always create a duplicate just in case I messed up and deleted something I decided I’d need later. Next, lowering the opacity to see below, I positioned the butterfly where I wanted it and also zoomed it outward.
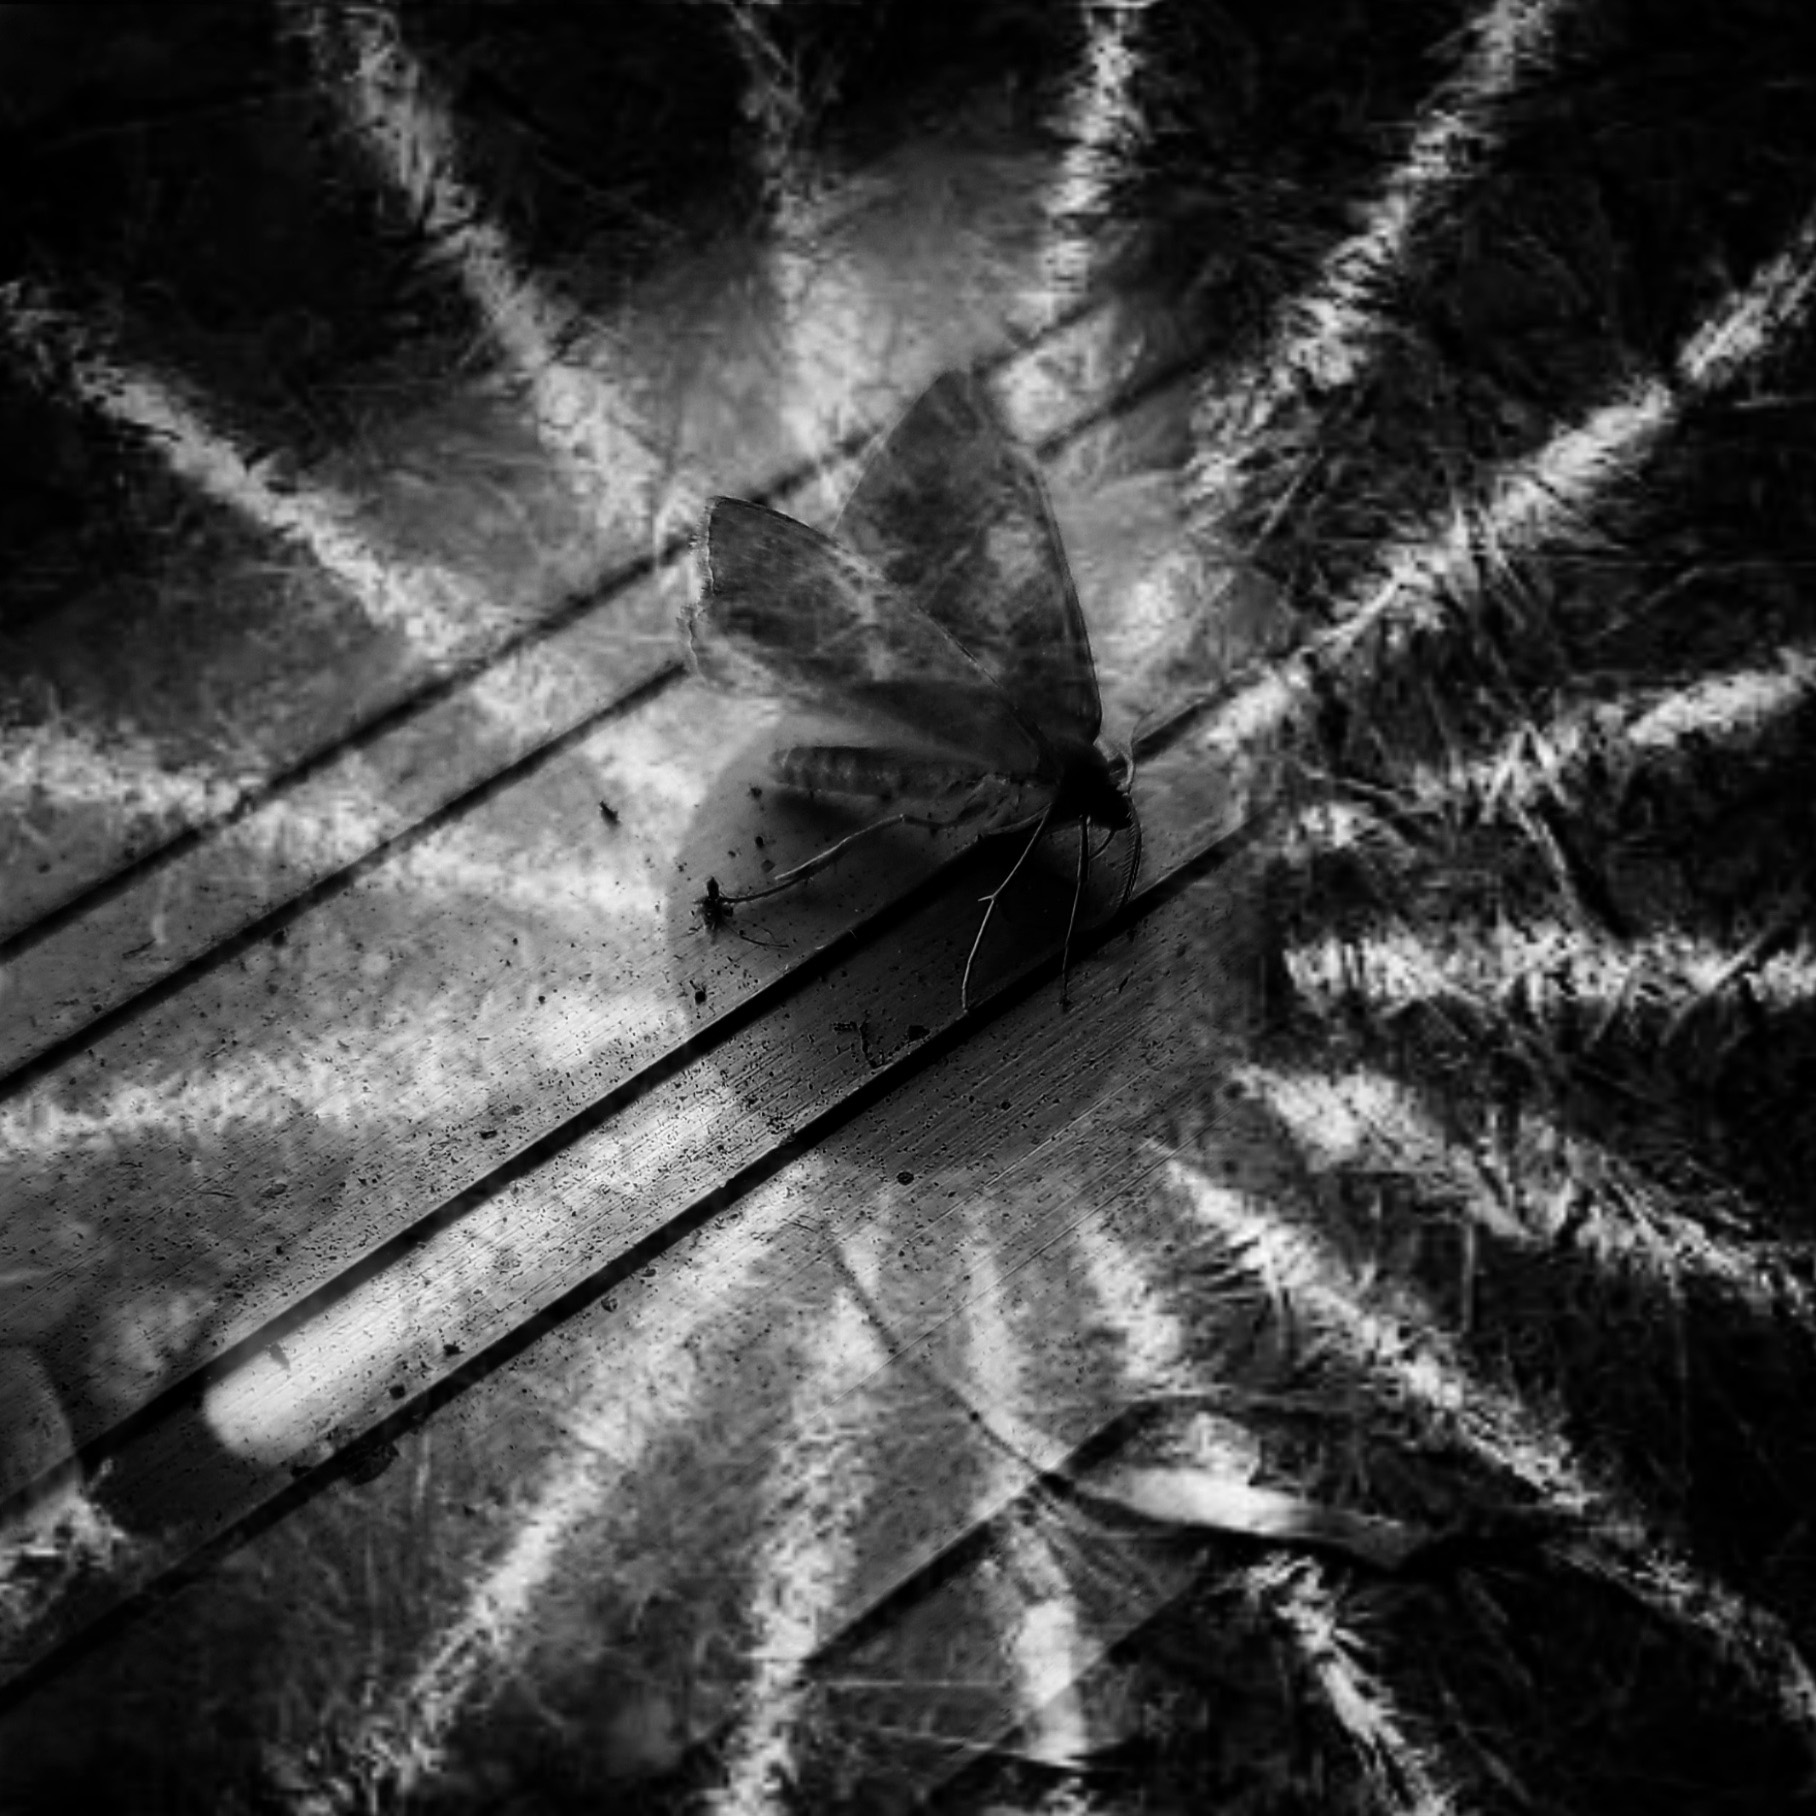
After that, keeping the opacity lowered, I used the eraser tool on an airbrush and erased the hard edges. I ended up with something that looked like this:
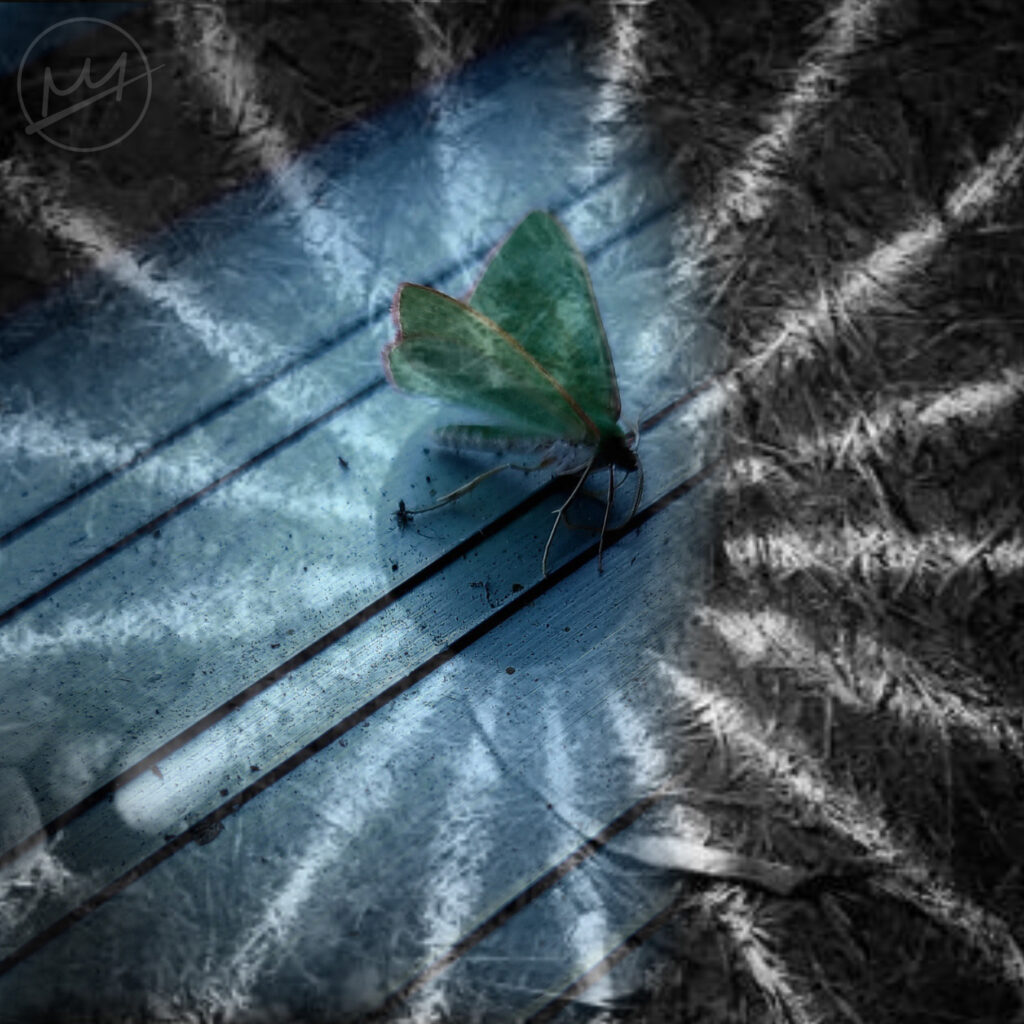
I downloaded the image and placed the “B&W” filter to make desaturate the entire image.
Photoshop
With Photoshop, the process would not include any worries of possibly deleting part of the image that might be needed later. To create the same effect, open the lamp image for the canvas to inherit its dimensions. Then, open the butterfly and lower the opacity. Move it so the butterfly looks like its standing on the lamp.
At this point, the eraser can be used to erase the pixels or a mask can be placed on the butterfly layer to only hide the pixels. With a soft brush, paint over the hard edges. If the images are not already desaturated, add a Hue/Saturation adjustment layer and turn the saturation all the way down or added a Black & White adjustment layer.
This is the result: