In This Page
Items Used
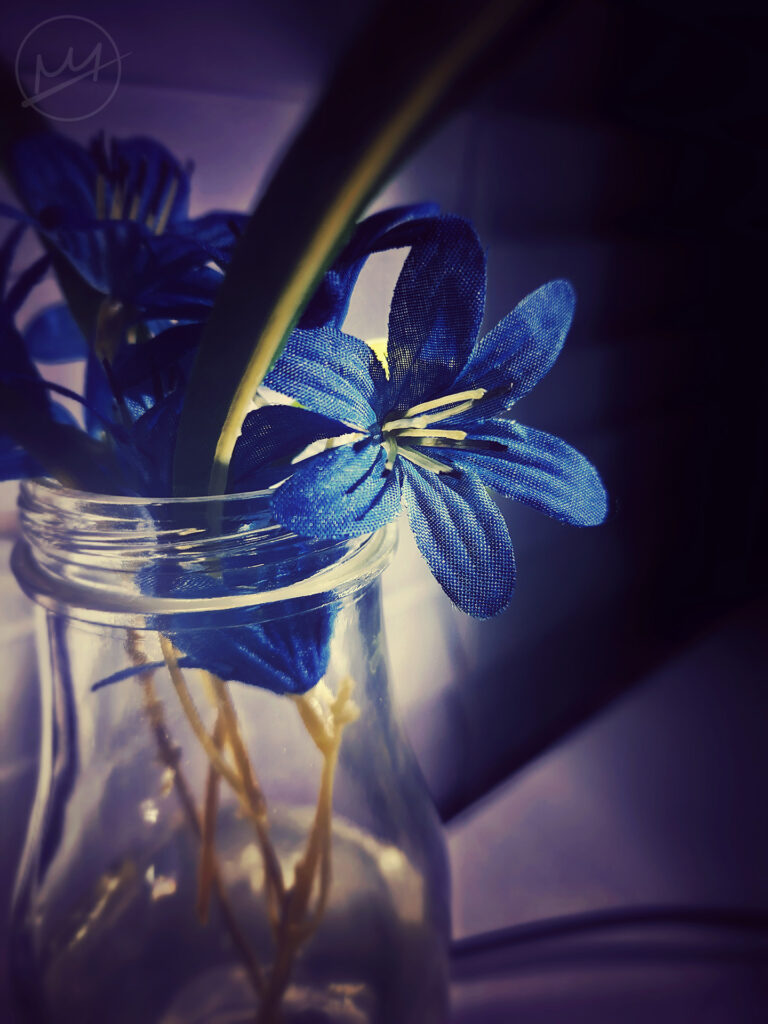
- Blue flowers
- Long leaves
- Glass jar
- A dim flashlight
Preparation & Photographing
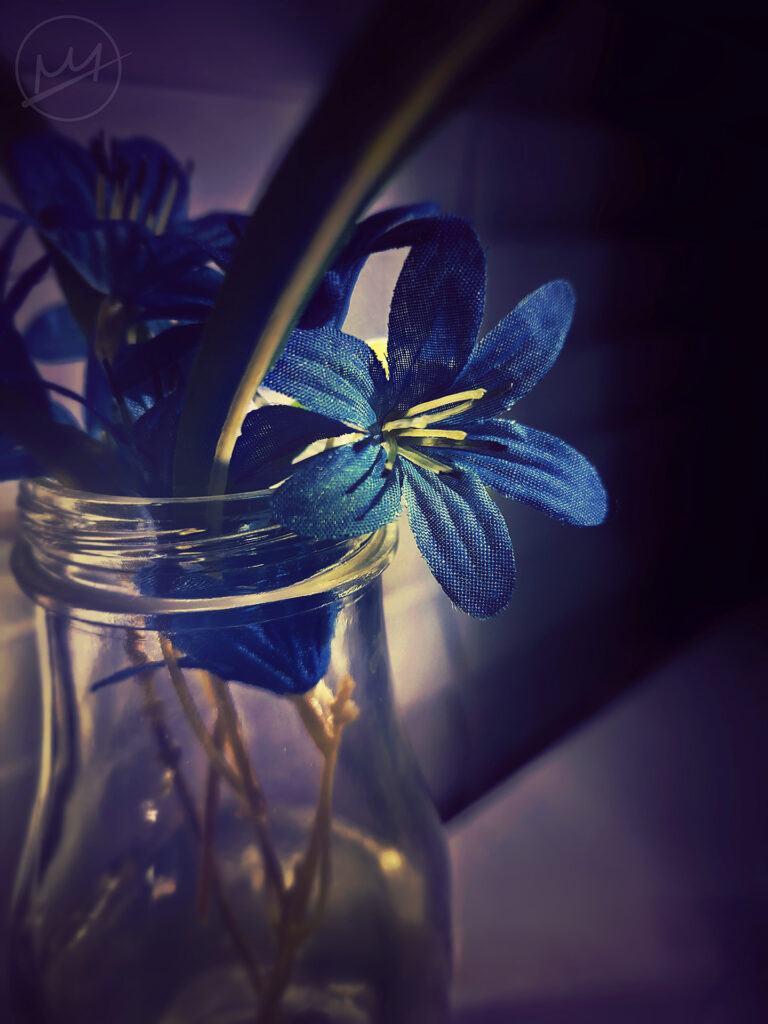
In a dark room, on top of a white table top, I arranged several blue flowers inside an empty jar. They were arranged like a ‘+’; four flowers total. For some accents, I added some long leaves between each flower, carefully making sure they didn’t disturb the flowers and didn’t poke out too much.
I placed the camera in front of one of the flowers and made sure it focused. Shining the flashlight on the white curtains behind the jar made the light bounce off it, illuminating the flowers. However, the dimness allowed for the dark to creep in around the edges of the photo.
Finishing Touches
The next step is editing.
Phone
On my phone, I used a free editing app called Snapseed to adjust this photo. I started by using a filter called, “Faded Glow” which gave the photo a slight purple hue. In addition, it also dimmed the photo. Under the “Tools” tab, I clicked the “Tune Image” where other basic adjustments could be made like brightness, contrast, etc.
Increase Contrast: made the transition between the light in the background and the dark edges smoother
Increase Highlights: heightened the brightness of the subject flower
Decrease Shadows: darkened the flowers in the background
After this, I ended up with the photograph to the left.
Photoshop
After that, I moved the photo to Photoshop where I removed the cable in the lower right using the Remove Tool. I also decided that the photo was in need of some more adjustments:
Color Balance: more blue on the blue-yellow spectrum negated the yellow areas within the jar and the long leaf. A softer brush on a mask kept this adjustment specific to those areas.
Curves: A basic photograph edit with curves is to make an ‘S’ with the line. That alone can improve a photograph, but others may need something else. For example, an ‘S’ curve made this image’s colors too saturated, but creating a point in the middle and dragging it down darkened the image overall. To remedy that, I created two new points; one a fourth of the way up and one a fourth down from the top and dragged them back to the center diagonal line. This, essentially, increased the shadows and highlights back to where they were while keeping the mid tones darker. For more information, here’s an informative guide for Curves.
Vibrance: A small amount of vibrancy made the purple hues richer and blend together smoothly.
The final result is below: